Creative Mobile Interiors provides a few dos and don’ts
By Owen Connaughton
In 30 years of converting and retrofitting motorcoaches I have seen the good, the bad and the ugly, all which have led me to some very specific dos and don’ts in the area of coach conversions.
Anyone about to convert a coach for personal use or for a client would do well to mind some key trouble areas. Four areas of consternation that generally arise in coach conversions are mechanical access, a serviceable cabin, floor space and plumbing.
Assure mechanical access
Whether you’re purchasing a converted coach or converting it yourself, it’s always paramount to keep serviceability in mind and make sure there is always easy access to coach components. This includes converter components and chassis components. Many coaches have the ATEC and DTEC modules in the under floor bays. These modules are often completely buried and near inaccessible. Coach air conditioning filters, blowers, and system components are typically in the under floor bays as well. Sometimes we have had to disassemble an entire plumbing bay to service these items. Before buying, or when planning your build, you will save yourself headaches down the road if you make sure these components are within reach.
Make the cabin serviceable
I’ve seen coaches built in such a way so that if the refrigerator or icemaker needs service, there’s not enough room to pull the unit out because it’s built too close to cabinetry. Alternatively, sometimes the unit can’t be taken out through the coach’s front because the aisles are too narrow. Many of these components require taking out the windshield so that they can get in and out of the coach. Avoiding these spatial issues can help ease serviceability in a converted coach.
It’s very important to make sure all interior equipment and electronics are vented. Improperly vented equipment can lead to thousands of wasted dollars for replacing refrigerators, TVs, and audio and satellite equipment. Read the manufacturer’s requirements for venting and make sure your coach complies.

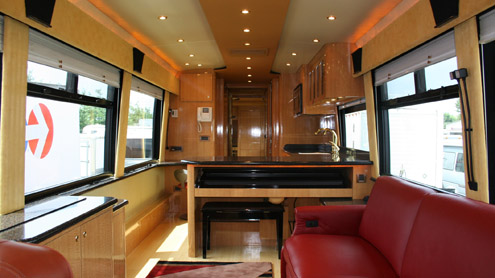
Design adequate floor space
Seating layout and design is another area of conversion that’s sometimes overlooked. As you layout the seating configuration, consider how much floor space will be taken up by passengers’ feet when seated. With two couches installed across from one another, it’s virtually impossible for someone to pass through the aisle. It’s always a good idea to install a dinette or individual seating across the aisle to improve access to the rest of the coach. A coach interior designed with a good “flow” ensures the owner and passengers will enjoy a comfortable ride for a long time.
Switch to pliable plumbing
We recommend PEX Tubing and fittings for the plumbing systems in a converted coach. PEX is an alternative to metal tubing and has many benefits to a vehicle. It is a flexible plastic that is able to bend around corners that would normally require fittings if metallic piping were used.
PEX does not require sweating the fittings. It requires no solder, blowtorch or special fittings, and comes in long lengths that enable a continuous run with no seams. It will not rupture if the system freezes. The fittings are attached with a special metal ring that is crimped on with special pliers. Generally, PEX installations include a manifold for the entire coach’s water system complete with shutoff valves. Much like an electrical circuit breaker panel, this manifold can be situated in the under floor plumbing bay where it allows coach owners to easily shut off water to any part of the coach should the need arise. BR
Owen Connaughton is founder and president of Creative Mobile Interiors, Grove City, OH.